Introduction to Custom Fields
What are Custom Fields?
Custom fields are separate pieces of information that you can display on a per-post and per-content-type basis. They are integrated into your design without touching a line of code.
On projects, custom fields can be displayed in a sidebar, on articles they appear as columns above the content (check your current theme, as each theme is styled differently).
Configuring Custom Fields
To configure Custom Fields, go to Admin > Settings > Custom Fields tab.
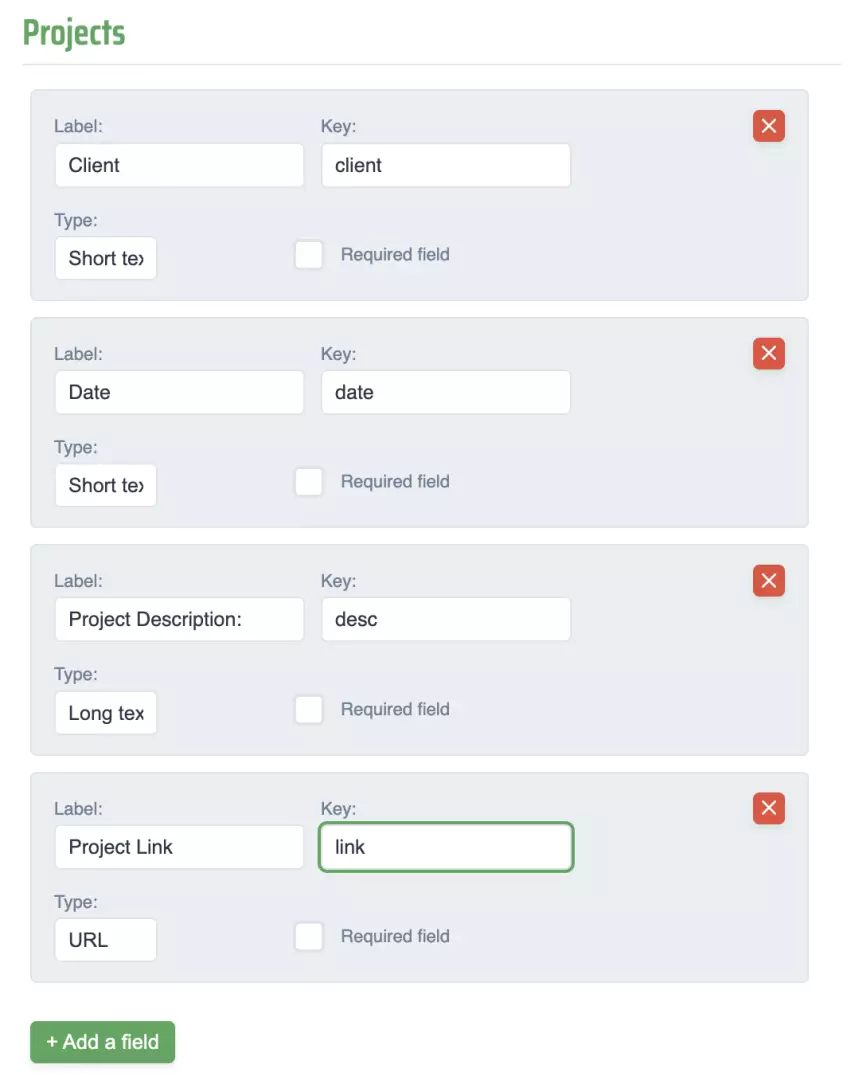
You can add specific fields for each content type (Articles, Pages and Projects). The available field types are:
| Custom Field Name | Example use |
|---|---|
| Short text | Client name, date... |
| Long text | Project description, explanation... |
| URL | External hyperlink to a project or site |
| Number | Price, number of people involved... |
| Checkbox | Finished or unfinished |
| Dropdown | Select from a predefined list (e.g. project status) |
Integrating Custom Fields in a Post
When custom fields are defined in Settings for a content type, a Custom Fields tab appears in the editor sidebar alongside Content and SEO.
Practical Example
Let's take an scenario: you want to display extra information on your Project posts — the client name, the project date, a description and a link to the project.
In settings, go to the Custom Fields tab. In the Projects section, add 4 new fields and give them a label name. These fields will now appear in a tab on every new project post.
Go to the Project post — open the custom fields tab in the sidebar and fill out the custom fields.
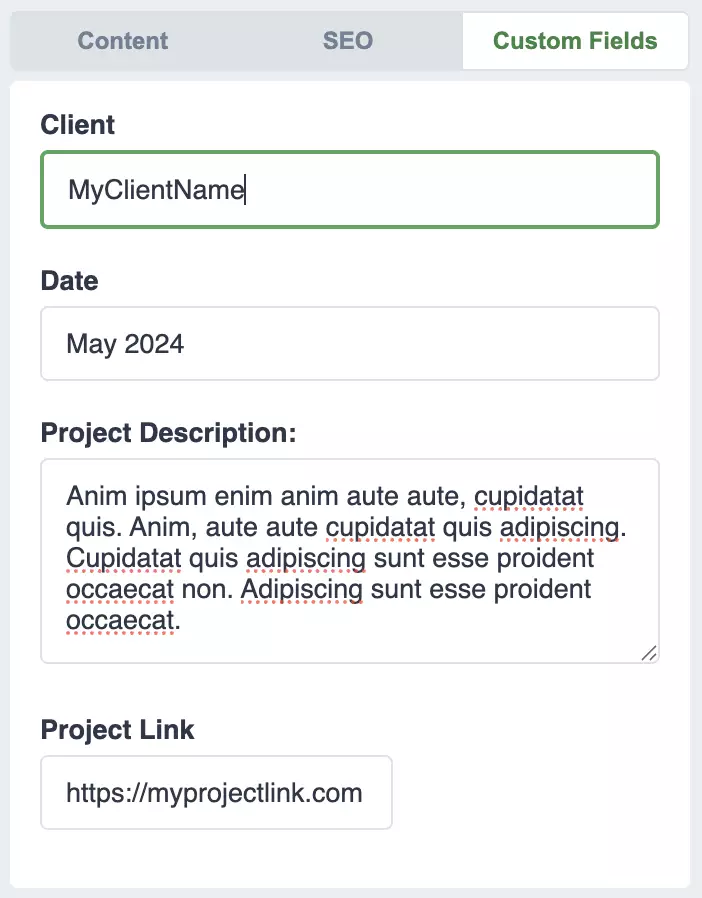
That's it. After publishing the project, you will see the custom fields appear either in a sidebar or elsewhere depending on the theme you are using.
Need help?
Advanced users can check out the documentation to find more detailed information.